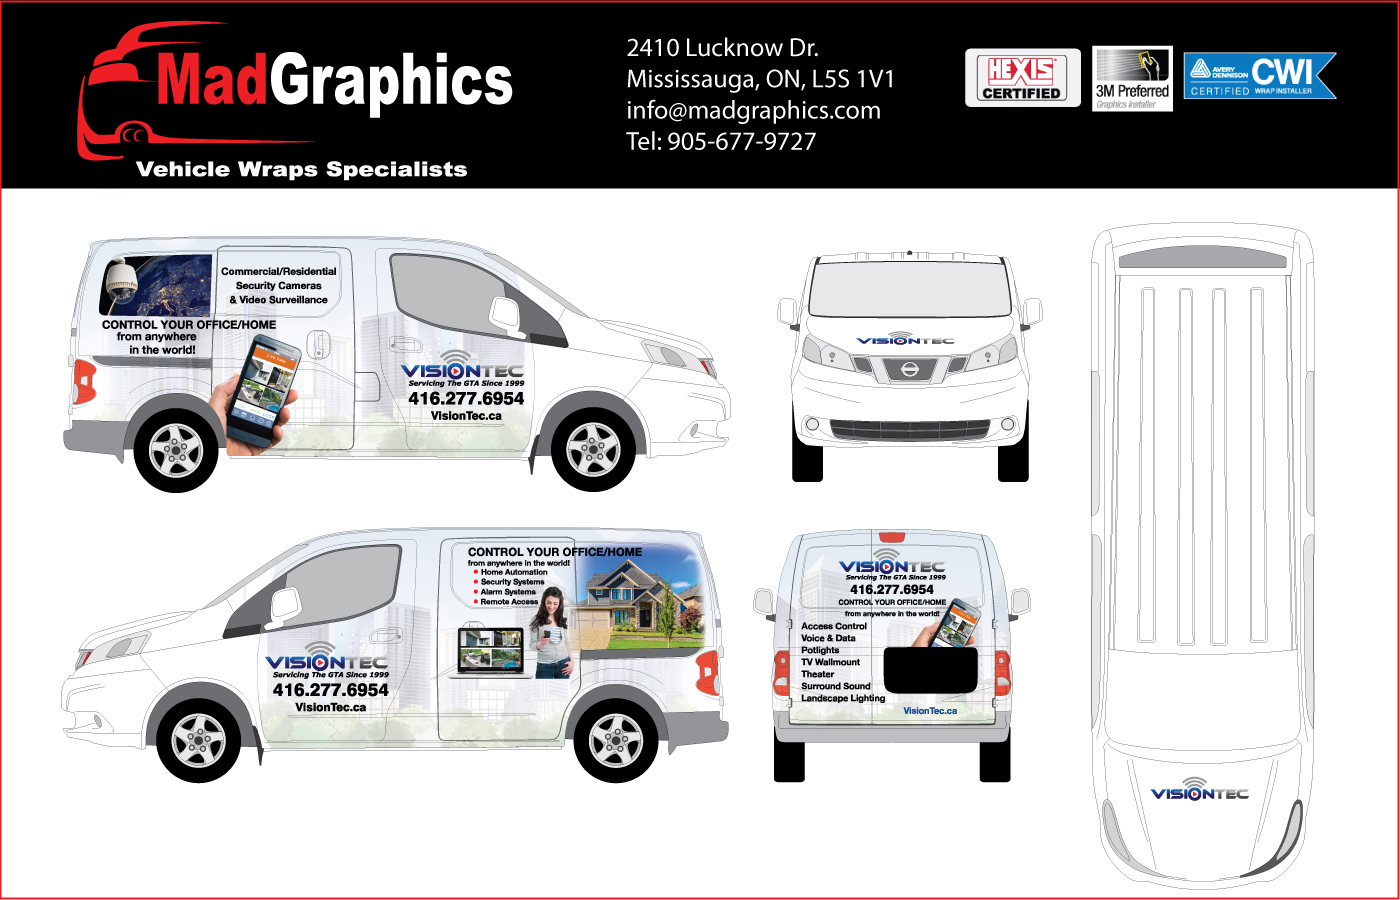
How to Get a Vehicle Wrap Design Started

Vehicle wraps are the most effective and popular method to promote a business. A vehicle's sides such as the doors are the perfect advertising spot to attract bypassers' eye. You would basically own a mobile billboard.
Most vehicle wraps come as large, and often full-bodied printed vinyl applied on its surface. Effective add design is a complex art, and any designer who may undertake a vehicle wrap project should at least hold an intermediate skill level of understanding graphic design programs. Below, the basic process of a vehicle wrap design will be discussed. Let's get started.
Do Your Research
Before designing takes place, you need to acquiere the proper template for the vehicle. Accurate template files are crucial for a design to be to-scale, and print-ready. Vehicle wraps can be elaborate, and file sizes quite large, charging anywhere from $70 up to $250 to make any design changes. Ideally, a client will provide you with the car's template files, if not, they can be purchased at car blueprint templates websites. Do note that template files are not always 100% accurate as vehicles may have silight irregularities.
Before design takes place, you should also ask your client to provide you with high-quality photos, and the model of the vehicle, and agree on a budget for stock photos.
Get Inspired
Technical information aside, it's time to get all your ideas flowing and get inspired to give your client their dream design. Assuming your client has a logo and any other sort of advertising copies set to go, sit down with them and discuss what they desire in a design. While not recommended, we have encountered many clients who love to add photos to their design. If that's the case, it's crucial to use extremely-high resolution images.
Keeping it simple is always the best way to go with a design, especially for business adds. Your client's vehicle will constantly be on the move, so it's important to not only catch eyes but quickly convey a message.
Creating The Design
After all necessary photos for the design have been obtained, you begin sketching. While many designers find much simpler to Photoshop the design on a photo of the vehicle first, you may also create a design in the template files.
While no design will be a complete match on a real car, it will help the visualizing process and get a better understanding of how graphics look on a car's corners and rounded surfaces. As with any mockups created, make sure they are simple to recreate or applied to the template file before finalizing the design. However, your design should look good both on paper (or photoshop) and once implemented in real life. Exceed your client's expectations.
Applying The Design
Files can either be created in Adobe Illustrator or Adobe Photoshop. Here at Mad Graphics, our design team prefers to deliver Adobe Illustrator files for handovers as some printers will only accept vector files for printing. Although, many printers do accept both PSD (Photoshop Data) and AI (Adobe Illustrator) files.
Things to Consider:
- Setting your color mode to CMYK for your documents.
- Create designs to-scale by using the 1:10 ratio.
- Set document's PPI to 720
- Only use high-resolution photos.
- Convert all fonts to outlines.
- Label and organize each section into separate layers.
- Add 5-10 in bleeds to each piece of the template. Since the design will wrap around edges of doors, the extra bleed will help the design grip onto the vehicle.
Delivering The Final Product
Provide the client with .ai, .psd files, and uncompressed .tiff files of the vehicle wrap's design. If any photos or raster images are used in your design, include raw photo files as well if files need to be adjusted. Also, makes sure they know the name of all fonts used and own a proper commercial license to in your design.
Vehicle wrap projects are most challenging, but they are the most rewarding examples of witnessing your designs come to life.